The 30MHz Connect gives power to the wireless sensor and sends data to the 30MHz Gateway. When you install the 30MHz according to this article, it is waterproof, dustproof, and transfers data in the best possible way.
Please note that this manual is only for the 30MHz Connect. If you want to know how you install the wireless network/30MHz Gateway, you should read first: How to install the 30MHz hardware.
Follow these steps to install your 30MHz Connect:
Install the mounting bracket
Place the 30MHz Connect & sensor combination near your crop
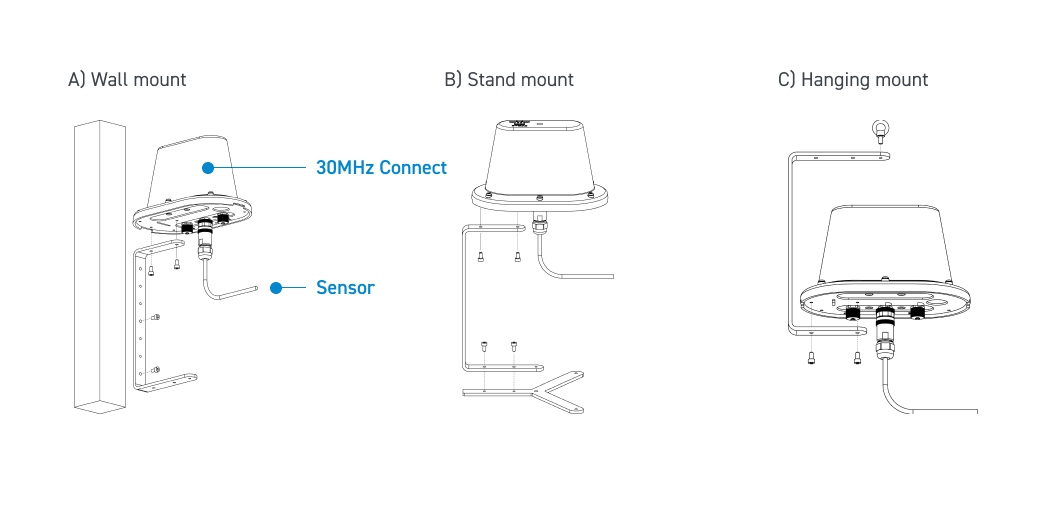
The mounting bracket gives you 3 mounting possibilities: A) wall, B) stand, & C) hanging mount. Choose the right one depending on what you want to measure, and assemble as you see in the images below. Important! To prevent water damage, always use the official mounting bracket and position the 30MHz Connect with the logo to the top.
The 30MHz Connect is fully charged and the sensor is plugged into the right port. You can use it straight away! It will appear online in a few minutes. Note! Some sensors need to be plugged into power (CO2, rain, airflow, and counter).
Tip: on the sensors page, you are able to see the Online % of the sensor calculated from the last hour. You should optimise your network range if the online percentage of a sensor is below 98%. Is your online percentage above 98%? Amazing! You are ready to measure!
Is your sensor not online?
- Try placing the 30MHz Connect & sensor combination closer to the 30MHz Gateway.
- Or enlarge your wireless network with our 30MHz Repeaters
If you need help, click on the Support button and get in touch with us!