Please take close attention to correct installation of your Substrate Moisture sensor. A poor installation can affect your data and potential cause accuracy loss greater than 10%. The position of the sensor, the calibration for the right substrate or soil profile, clean probes, and air gaps can all impact the accuracy of the sensor.
Avoid air gaps around your probesWhen installing the sensors, please avoid air gaps. The probes of the sensor should have direct contact with the substrate or soil. Air gaps will affect your data. Metergroup has described two scenarios of what air gaps look like in your data. Click here to learn more from Metergroup.
Install the sensor in soil
The sensor has to be installed in the effective root zone of your crop. Please take a look at the article ''What is the correct sensor depth for my crop?'' to find specific information for each crop.
- Dig a hole of the desired depth next to the plant that you want to monitor. For example, for tomatoes, dig a hole about 22cm deep.
- Install the sensor carefully by hand into the undisturbed soil of the hole sidewall with the needles oriented horizontally. The sensor may be positioned in any direction. However, with the body in a vertical position(as shown below), there is less restriction to water flow.
- Place the 30MHz Connect where it can stay during the whole crop cycle, with the logo on the casing facing upward.
- Please keep the loose cable out of the hole.
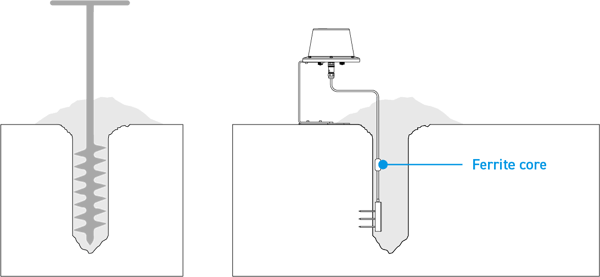
- Backfill the hole. Return soil to the hole, packing the soil back to its native bulk density to avoid air gaps near the sensor. Be careful not to pull the 30MHz Connect while filling the hole and do not hit the ferrite core as this could potentially pull the sensor out of soil.
Different insert sensor positions are available for substrate and you can choose the one that gives you the best measurement. For more information, read Which calibration profiles are available for Substrate Moisture sensors?
The sensor probes should be inserted fully, with the probes perpendicular to the slab. If you use a calibration, please check the specific position/orientation for the sensor. The position and orientation are also described in the name of the calibration in the platform. Install the sensors in an undisturbed part of the substrate, and when reinstalling don't use the old holes. This is to avoid air gaps around the sensor needles.
