By following this short manual, you will quickly get your sensors online. Follow the steps to install your hardware:
1. Install the Gateway - bring your wireless network online
2. Test the 30MHz Connect & sensor combination
3. Install the mounting bracket on the 30MHz Connect
4. Install in the field
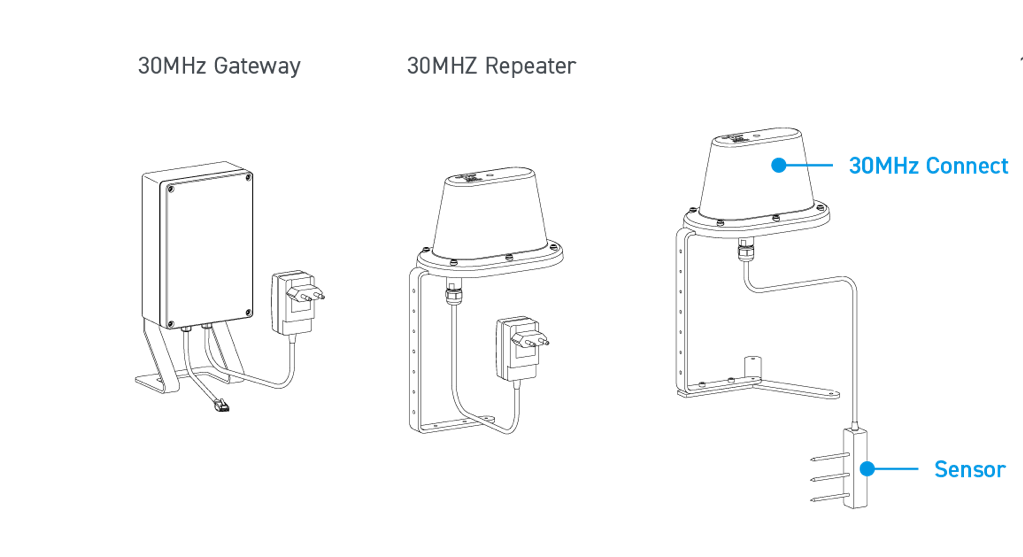
Parts mentioned in this manual
1. Install the 30MHz Gateway
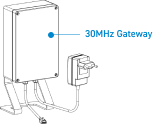
Position the 30MHz Gateway, as you see in the image below, in an office environment where internet connection and power are available. Plug the Ethernet cable and the power supply in the matching sockets. Check if the blue power light in the gateway turns on, and check if the orange and green lights on the Ethernet port turn on.
Log in on the 30MHz platform and go to the sensors page via the main menu. The status of the 30MHz Gateway should be online within a few minutes.
30MHz Gateway not online?
It could be that certain firewall settings are blocking the data. Read here how to troubleshoot the 30MHz Gateway.
Note: previous versions of the 30MHz Gateway may not have a bracket, or came with an external Laird antenna.
- If it did not have an external Laird antenna and bracket, we advise replicating the setup as the image above.
- If the gateway came with an external Laird antenna, place the antenna vertically as high as possible. The positioning of the gateway does not matter in the latter case.
2. Test the 30MHz Connect & sensor combination
Before you continue, keep the connects and sensors near the gateway (within a few meters), and make sure the connects and sensors are online. Check if the 30MHz Connects are fully charged and the sensor is plugged into the right port. The connects/sensors should come online, this can take approximately 5 minutes. Note! Some sensors need to be plugged into power (CO2, rain, airflow and counter sensor)
Is your sensor offline?
- Try placing the 30MHz Connect & sensor combination closer to the 30MHz Gateway.
- Or enlarge your wireless network with our 30MHz Repeaters. Plug the 30MHz Repeater into a power supply and place as high as possible. It should come online (status: ok) within a few minutes.
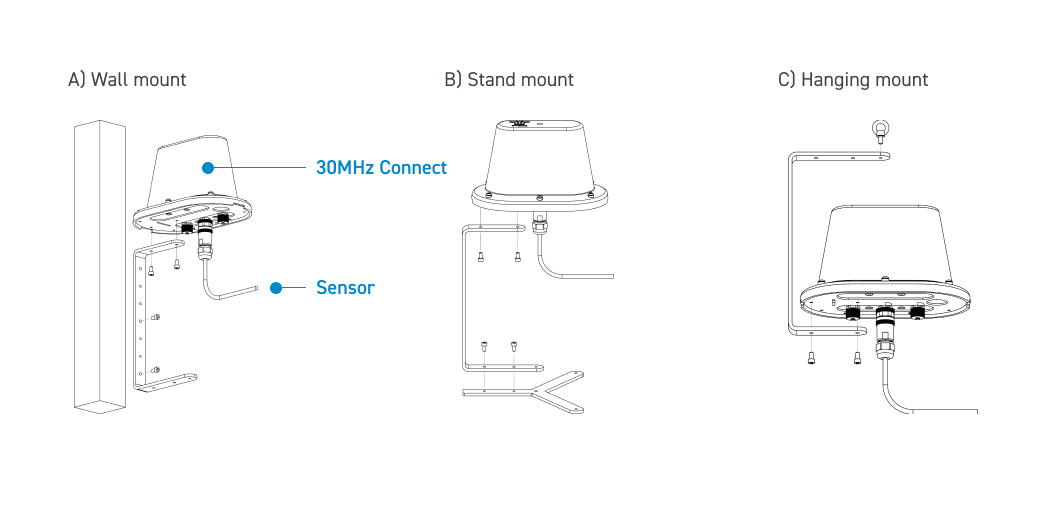
3. Install the mounting bracket on the 30MHz Connect
The mounting bracket gives you 3 mounting possibilities: A) wall, B) stand, & C) hanging mount. Choose the right one depending on what you want to measure, and assemble as you see in the images below. Important! Always use the official mounting bracket and position the 30MHz Connect with the logo to the top.
4. Install in the field
Place the repeater between the 30MHz gateway and the target crop, as explained in this article. Next, you can move your connects and sensors near your crop.
Tip: on the sensors page, you are able to see the Online % of the sensor calculated from the last hour. You should optimise your network range if the online percentage of a sensor is below 98%. Is your online percentage above 98%? Amazing! You are ready to measure!
Note: previous 30MHz Repeaters came with an external Laird antenna and no mounting bracket. Place the antenna vertically as high as possible.
All devices online? All right, you can start measuring! Now it's time to visualise your data in the platform.