This article explains how to install the Pointed Micro Climate sensor (PMC). If you need to install the 30MHz Connect and/or Gateway, read the following article first: How to install the 30MHz hardware. Take the following steps to install the Pointed Micro Climate sensor:
Attach the meteoshield on the mounting bracket
Insert the Temperature Humidity sensor in the meteoshield
Attach the Pointed Temperature sensor
Optional: combining mounting brackets
Attach the Meteoshield on the mounting bracket
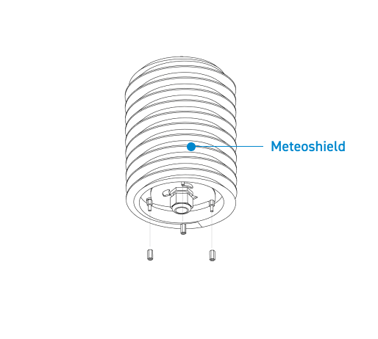
1. Screw the three nuts on the bottom of the Meteoshield.
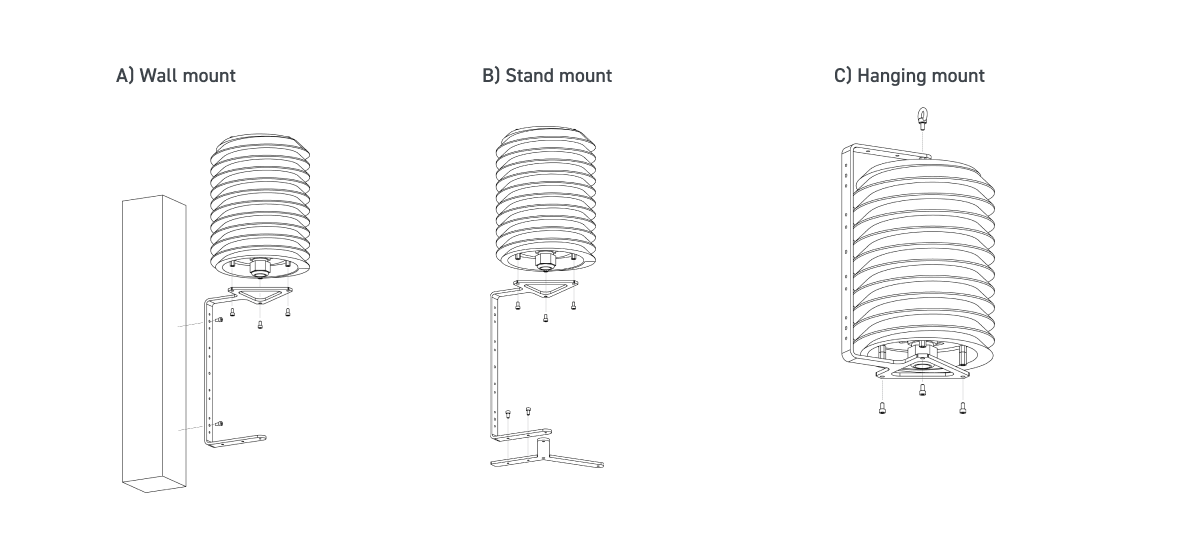
2. The mounting bracket can be attached in three different ways; A) wall, B) standing, or C) hanging. Choose the right one for your situation and attach the mounting bracket according to the images below.
Insert the Temperature Humidity sensor in the Meteoshield
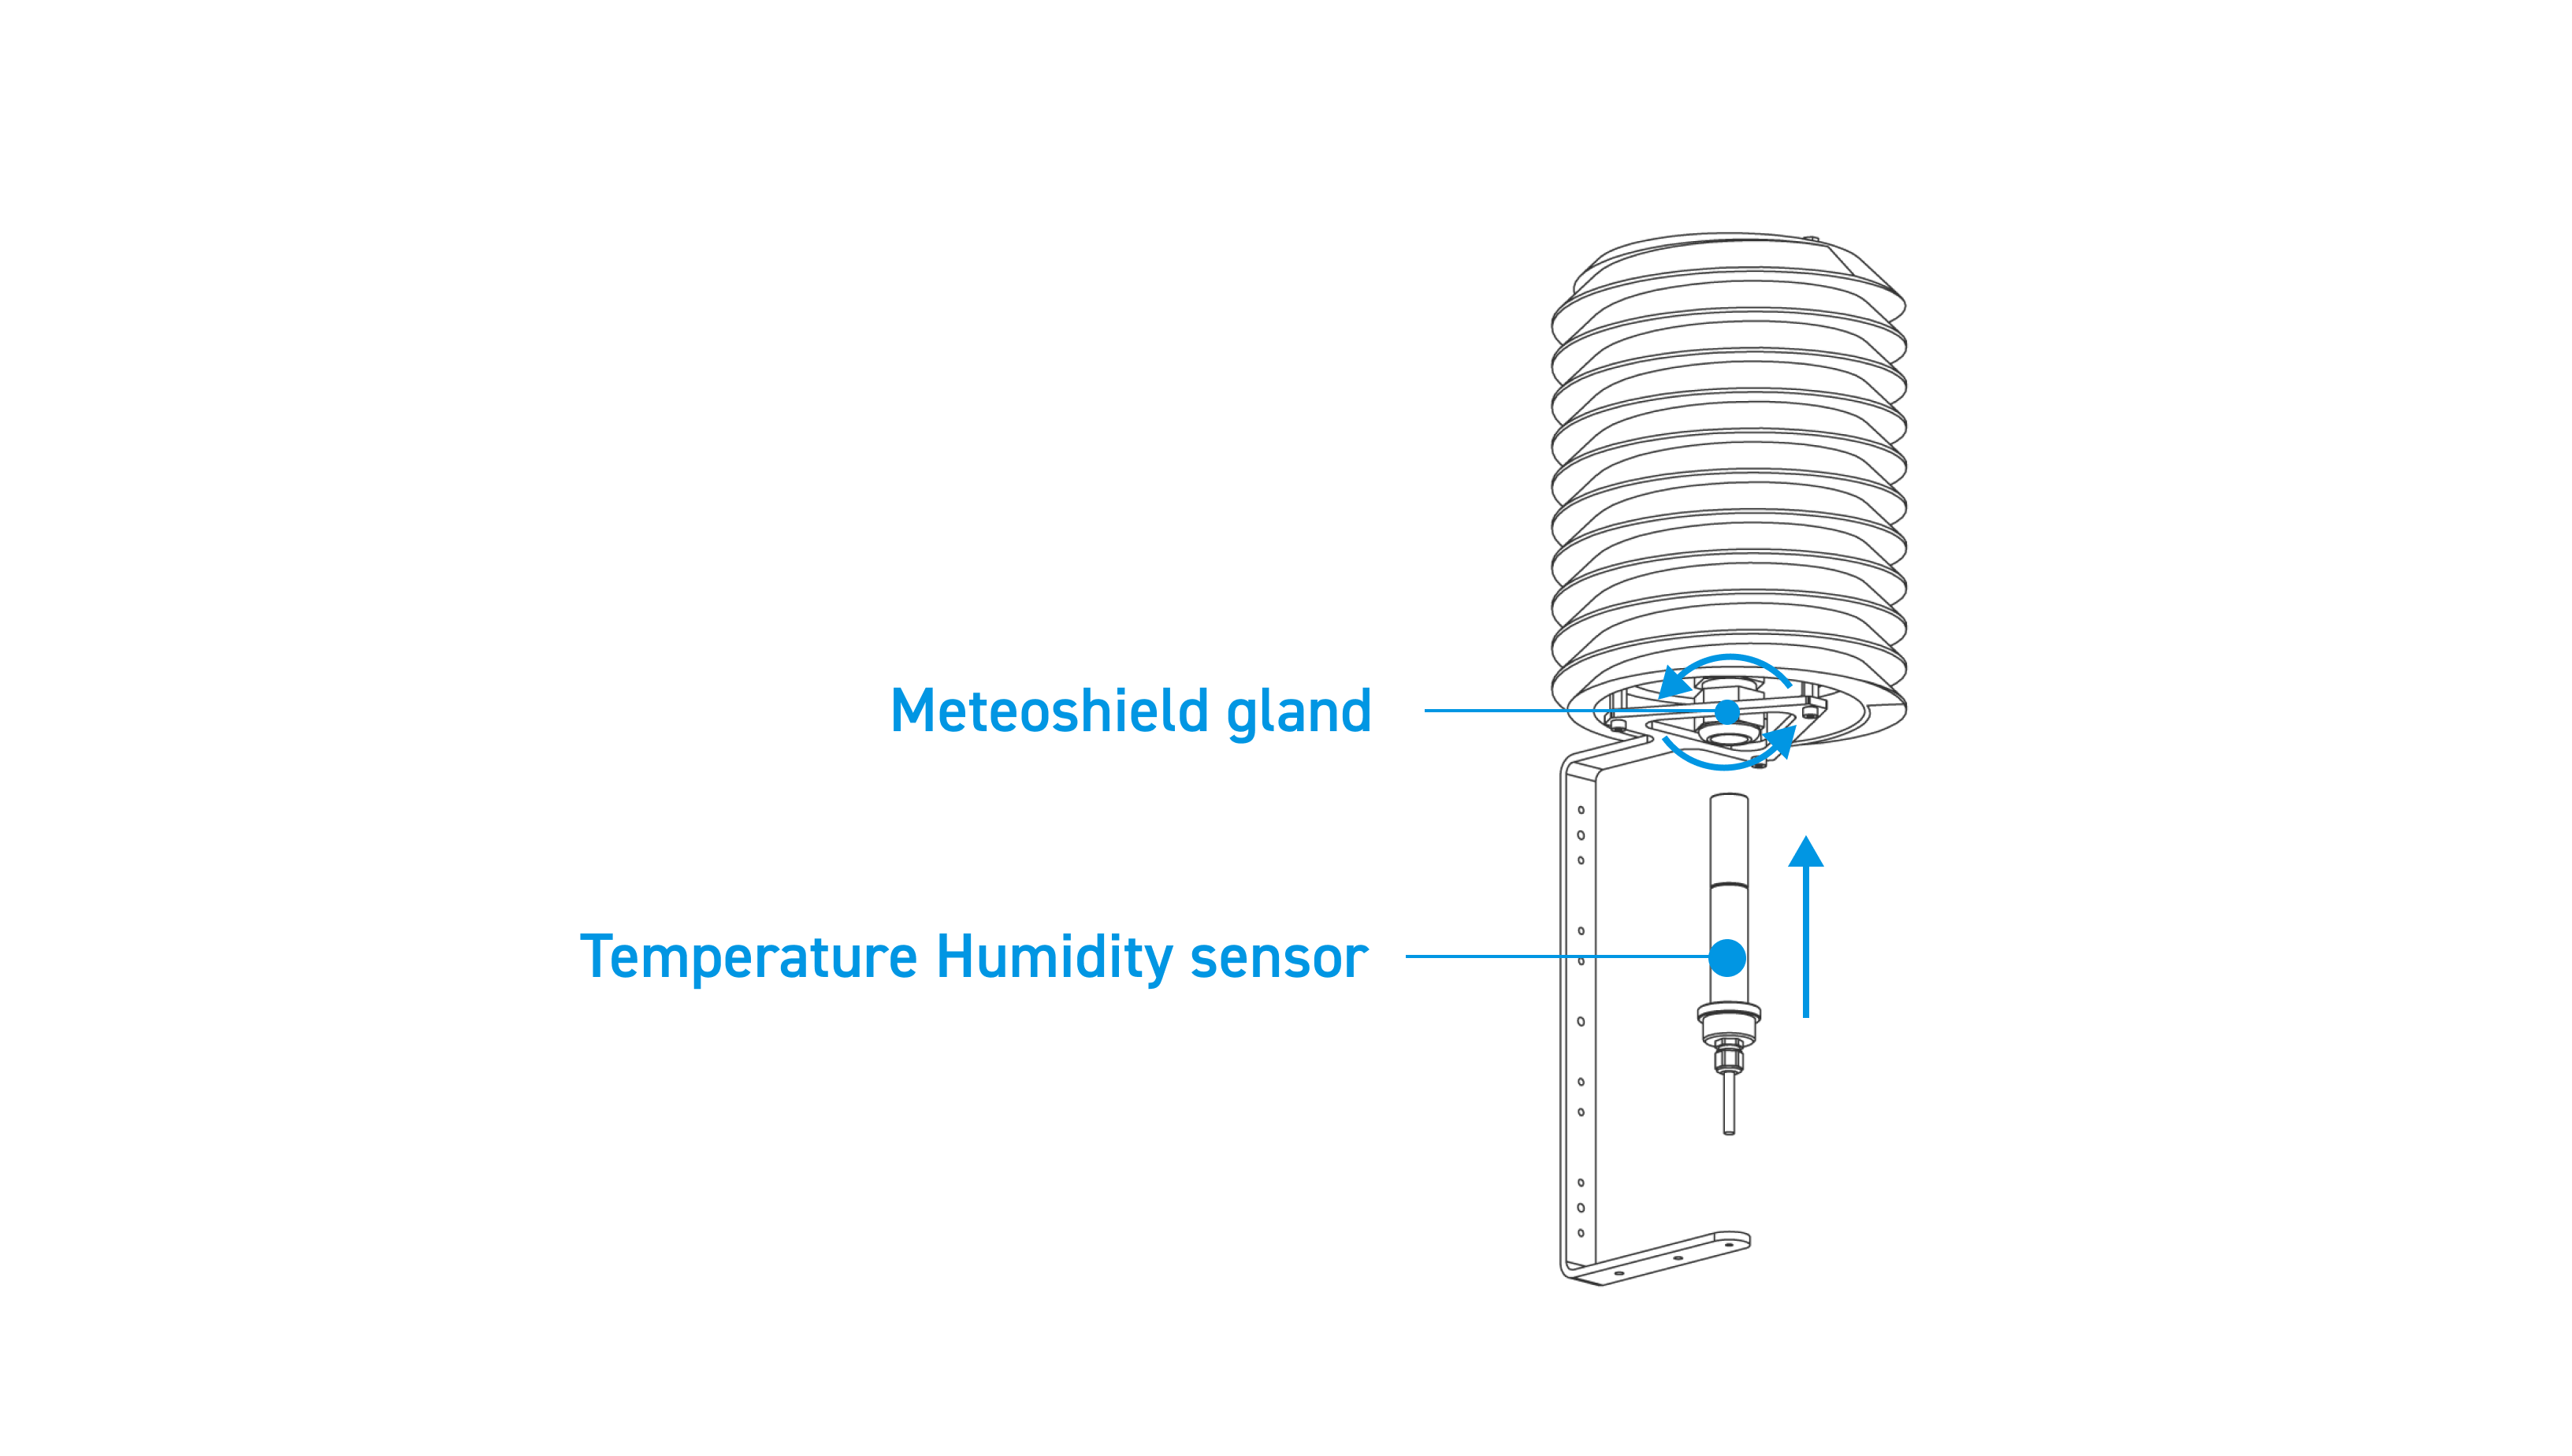
3. Unscrew the Meteoshield gland slightly and insert the sensor. Tighten the Meteoshield gland firmly.
Attach the Pointed Temperature sensor
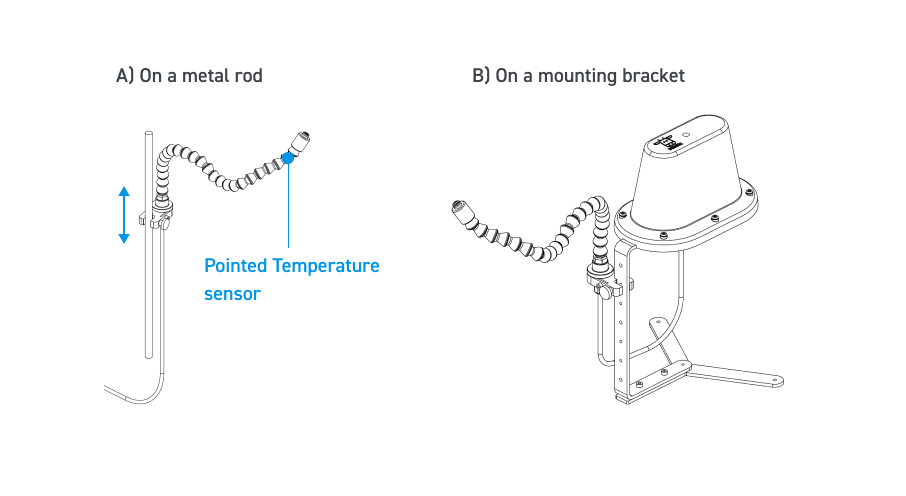
4. The Pointed Temperature sensor is supplied with a clamp that can be assembled on A) a metal rod to easily follow your crop. Or B) attach it on a mounting bracket in one of the holes.
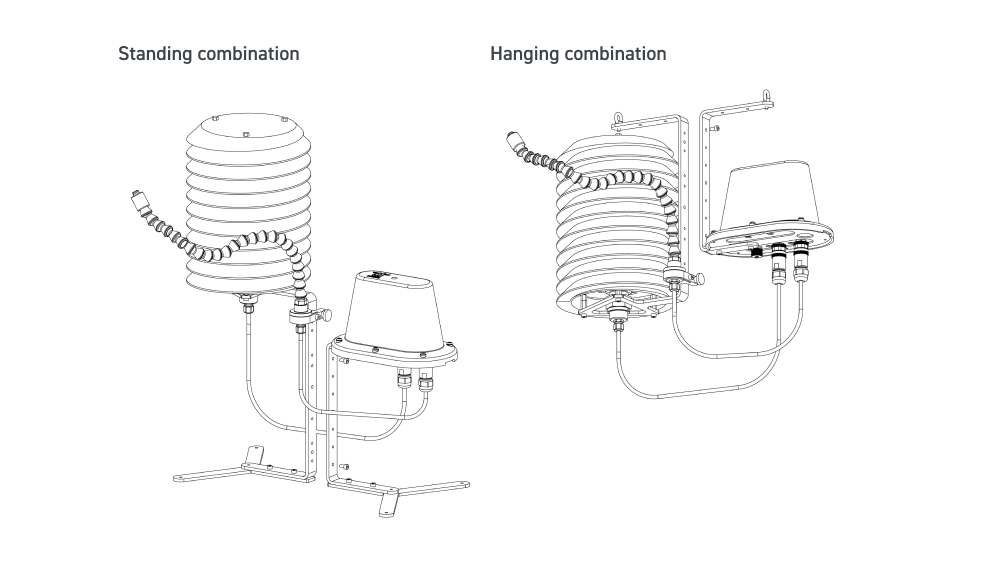
Optional: combining mounting brackets
You can combine two mounting brackets into one, easy to move, unit (A or B). Always match the orientation as shown in the images.
If you need help, click on the Support button and get in touch with us!